Monday, June 2, 2025

Context-Aware Configuration (CAConfig) in AEM with WCM-IO – A Practical Guide


Context-Aware Configuration (CAConfig) in AEM with WCM-IO – A Practical Guide


context-aware configuration in aem


When building multi-language or multi-site Adobe Experience Manager (AEM) websites, you often need to apply site-specific or language-specific configurations.

For example, imagine you have an English site and an Arabic site. You may want different authentication settings, API keys, or UI labels based on which site the user visits. This is where Context-Aware Configuration (CAConfig) in AEM becomes incredibly useful.

It allows you to define configuration values at the site, language, or page level, and AEM automatically picks the correct values based on the page context.


Why Use Context-Aware Configuration in AEM?

CAConfig makes your code:

  • Flexible – define different settings for different sites or pages
  • Clean & Secure – no hardcoding values
  • Maintainable – easier for teams to update settings in /conf


Getting Started with CAConfig in AEM

  • Navigate to your core module in the AEM Maven project, and optionally create a config package (e.g., com.myproject.core.config).

  • Then create a Java interface, for example: MsalConfig.java.

 package com.adobe.aem.guides.inowate.core.config;

import org.apache.sling.caconfig.annotation.Configuration;
import org.apache.sling.caconfig.annotation.Property;

@Configuration(
label = "Inowate - Context Aware Configuration for MSAL",
description = "Context Aware Configuration for Inowate AEM Project"
)
public @interface MsalCaConfig {

@Property(     label = "Configuration Name",     description = "Name of the configuration context")
String configName() default "configName:";

@Property(     label = "Entra ID",     description = "Unique identifier for the application")
String entraID() default "entraID:";

@Property(     label = "Authority",     description = "Authorization server or token issuer URL")
String authority() default "authority:";
}

How to Use Context-Aware Configuration in Your AEM Component

Once your configuration interface is ready, the next step is to use it in your component where it’s needed.

For example, I have a component called TeamMember, and I want to access the configuration values defined via CAConfig and display them on the HTML output. For demonstration purposes, I’ll simply render the values in the 


 package com.adobe.aem.guides.inowate.core.models;
 import com.adobe.aem.guides.inowate.core.config.MsalCaConfig; //importing config here
 @Model(adaptables = { SlingHttpServletRequest.class,
Resource.class }, defaultInjectionStrategy = DefaultInjectionStrategy.OPTIONAL)
public class TeamMembersModel {

private static final Logger LOGGER =      LoggerFactory.getLogger(TeamMembersModel.class);

@SlingObject
private Resource currentResource;

private String configName; // local veriables will use for config
private String entraID; // local veriables will use for config
private String authority; // local veriables will use for config
    
    @PostConstruct
    protected void init() {
if (currentResource != null) {
ConfigurationBuilder configBuilder             = currentResource.adaptTo(ConfigurationBuilder.class);
if (configBuilder != null) {
MsalCaConfig caConfig = configBuilder.as(MsalCaConfig.class);
if (caConfig != null) {
configName = caConfig.configName();
entraID = caConfig.entraID();
authority = caConfig.authority();
LOGGER.info("Loaded CAC: configName={},                 entraID={}, authority={}", configName, entraID, authority);
} else {
LOGGER.warn("CAConfig is null");
}
} else {
LOGGER.warn("ConfigurationBuilder is null");
}
}
    }
    // functions that will return the configs values.

    public String getConfigName() {
    return configName;
    }

    public String getEntraID() {
    return entraID;
       }

    public String getAuthority() {
    return authority;
    }

    }


Here, I’m simply rendering the configuration values in the HTML file for demonstration purposes.


Also, add the following code in /core/pox.xml in the <bnd> tag, adjust the code according to. Your project classes
 
 <bnd><![CDATA[
-plugin: org.apache.sling.caconfig.bndplugin.ConfigurationClassScannerPlugin,\
org.apache.sling.bnd.models.ModelsScannerPlugin
Sling-ContextAware-Configuration-Classes: \
com.adobe.aem.guides.inowate.core.config.MsalCaConfig
    Import-Package: javax.annotation;version=0.0.0,*

]]></bnd>

Deploying the Configuration

To deploy the configuration, run the following Maven commands:

  • mvn clean install -PautoInstallBundle -Padobe-public
  • mvn clean install -PautoInstallPackage -Padobe-public


Creating the Configuration in CRXDE Lite


  1. Navigate to /conf/projectname and create a folder named sling:configs. Make sure the folder’s primary type is set to sling:Folder.
  2. Inside sling:configs, create a new node with type nt:unstructured. Name this node exactly the same as your configuration interface file from the core module (for example, MsalConfig).

  3. Under this node, define the properties using the same field names as declared in your Java config interface. Assign appropriate values to these properties.

  4. To support multiple languages or sites (e.g., English and Arabic), create additional folders named en and ar, and copy the sling:configs structure into each. Then update the values based on the specific language or site requirements.

You can create as many language or site-specific folders as you need, based on your project requirements.

Refer to the screenshot below for a clear structure example.


/conf/inowate/sling:configs

sling:configs


/conf/inowate/en/sling:configs

sling:configs
/conf/inowate/ar/sling:configs

sling:configs

Linking Context-Aware Configuration to Your Sites

To apply your Context-Aware Configuration (CAConfig) to specific sites or pages, you'll need to set the sling:configRef property.

Navigate to the jcr:content node of the page where you want the configuration applied, and add the sling:configRef property. The value should be the path to the configuration you want to load.

In my setup:

  • I'm linking the general sling:configs to the language-masters site.
  • The /en configuration is linked to the English site.
  • The /ar configuration is linked to the Arabic site.

This allows AEM to automatically resolve and apply the correct configuration based on the context of the site or page being accessed.

Refer to the screenshots below for visual guidance.


For language-masters


For English site /content/inowate/language-masters/en

For Arabic site: /content/inowate/language-masters/en


So, when I load the English site page, AEM fetches the configuration from:

/conf/inowate/en/sling:configs

And when I load the Arabic site page, it pulls the configuration from:

/conf/inowate/ar/sling:configs

This ensures each language site uses its specific context-aware settings. Refer to the following screenshots for a clear example:

English Site Configuration Output:

Context-Aware Configurations


Arabic Site Configuration Output:
Context-Aware Configurations

Note: 

If you have another site, for example a German site, and you haven’t created specific Context-Aware Configurations for it, AEM will fall back to the default configuration located at: /conf/inowate/sling:configs

It won’t use the configurations from the en or ar folders, as those are specifically tied to the English and Arabic sites.


Context-Aware Configuration with WCM-IO Editor

Using the WCM-IO Editor, you can easily manage site-specific or page-specific Context-Aware Configurations (CA-Configs) in AEM. It simplifies the process of creating, updating, and maintaining CA-Configs through a user-friendly interface.

The initial steps remain the same as previously discussed. After that, you’ll need to install the WCM-IO package. This can be done by downloading the package and deploying it to AEM via CRXDE Lite.

Click here to download the WCM-IO package

Next, you’ll need to create a template, which will be used for creating your CA-Configuration page. You can create this template at the following path:

/apps/your-project/templates/template-name

Here’s the sample code for the template I’ll be using to create the CA-Configuration page:

 
 <?xml version="1.0" encoding="UTF-8"?>
<jcr:root xmlns:sling="http://sling.apache.org/jcr/sling/1.0"
xmlns:cq="http://www.day.com/jcr/cq/1.0"
xmlns:jcr="http://www.jcp.org/jcr/1.0"
jcr:primaryType="cq:Template"
jcr:title="CAConfig Editor Page"
jcr:description="Template to edit context-aware configurations"
allowedPaths="[/content(/.*)]"
ranking="{Long}100">

<jcr:content
jcr:primaryType="cq:PageContent"
sling:resourceType="wcm-io/caconfig/editor/components/page/editor"
jcr:title="CAConfig Editor Page"/>
</jcr:root>


Screenshot from the code:


 After creating the template, make sure to include its path in the src/main/content/META-INF/vault/filter.xml file by adding the following entry:

<filter root="/apps/projectName/templates"/>


Now, run the following command to deploy the template to your AEM instance:

mvn clean install -PautoInstallPackage -Padobe-public


On CRXDLITE: 


Once the deployment is complete, let's say you have a German site and want to create a site-specific configuration for it.

To do this, go to CRXDE Lite, create a new folder named de under /conf/your-project/, and add the sling:configs node inside that folder then at the page level of your German site add sling:configRef  and assign the path to its until de folder. This will link the site to its specific context-aware configuration. Refer to the screenshots below for guidance.


Next, add the sling:configRef property to the jcr:content node of the German website page.


Creating a CA Configuration Page for the German Site

  • Navigate to the German site in AEM.
  • Select the German main page and click on the create button.
  • Choose the Configuration Template.
  • Enter a name for the configuration page and click Create.
  • Open the newly created page.
  • Click on the Configuration option.
  • Add the site-specific values you want for the German page.
  • Go to your German site page and refresh it.

You’ll now see that German-specific CA configurations are applied only to the German site.


Selecting the German page to create the CA config page


Create site specific ca page

selecting template
select CA - template

Adding the name of a page
name of CA - Page

Clicking on configuration 
Click on configuration inside ca page


Adding values for German page


update  CA values


Final output

german page final output with ca


Benefits of Using Context-Aware Configuration (CAConfig) in AEM

Custom Configs for Each Site or Language

You can easily set up different configurations for each website or language version — like English, Arabic, or German — without mixing things up.

Applies Configs Based on Page Location

AEM automatically picks the right configuration based on where the content lives, so there’s no need to write extra code to handle it manually.

All Configurations in One Place

Everything stays organised under the /conf folder, making it easier to manage and reuse across different components and pages.

Less Code, More Clarity

Since the logic lives in configuration, your components don’t need as many if-else checks, keeping the code clean and easier to maintain.

Perfect for Multi-Site Projects

If you're building for multiple brands or clients under one AEM instance, CAConfig helps you keep each one separate with its own set of rules.

Built-in Fallback Support

If a specific configuration isn’t found, AEM will automatically fall back to a default one — like global settings — so your site stays functional.

Secure and Easy for Authors

Configuration is separate from content, and tools like the wcm.io editor make it easy for non-developers to update values when needed.

Flexible Down to the Page Level

You can even have different settings for individual pages if needed — for example, one page could show a different layout or title than another.

Scales Well as You Grow

Whether you’re adding new regions, languages, or brands, CAConfig makes it simple to scale your setup without a mess.


Difference Between OSGi Configuration and Context-Aware Configuration (CAConfig) in AEM
OSGi Configuration

System-Level Settings

OSGi configs are mostly used for backend services and bundles — like setting up a connection to an external API, defining timeouts, or toggling a feature flag globally.

Applies Globally

Once set, the values apply across the whole AEM instance unless you're using run modes to split them.

Managed via Felix Console or Files

You typically manage OSGi configs through the Felix console (/system/console/configMgr) or deploy them from files under /apps or /libs.

Developer-Oriented

Mostly handled by developers or DevOps teams, not authors. Not very user-friendly for content teams. 


 Context-Aware Configuration (CAConfig)

Content-Level Settings

CAConfig is used when you need site-specific or page-specific settings, like setting a site title, map coordinates, or theme per language/site.

Applies Based on Context

It automatically picks the correct config based on where the content lives (e.g., /content/site/en vs /content/site/ar).

Stored Under /conf

All configurations live neatly under the /conf folder and can be edited through CRXDE or even via UI tools like wcm.io editor.

Author-Friendly

Authors or content admins can manage CAConfigs easily without touching code. It’s made for flexibility on the content side.


Conculusion

Context-Aware Configuration in AEM makes managing site- and language-specific settings simple and efficient. It helps keep your code clean and lets authors update configs easily without developer help. This approach is perfect for scaling multi-site projects smoothly. If you want flexible and maintainable configs, CAConfig is the way to go! 


Monday, April 21, 2025

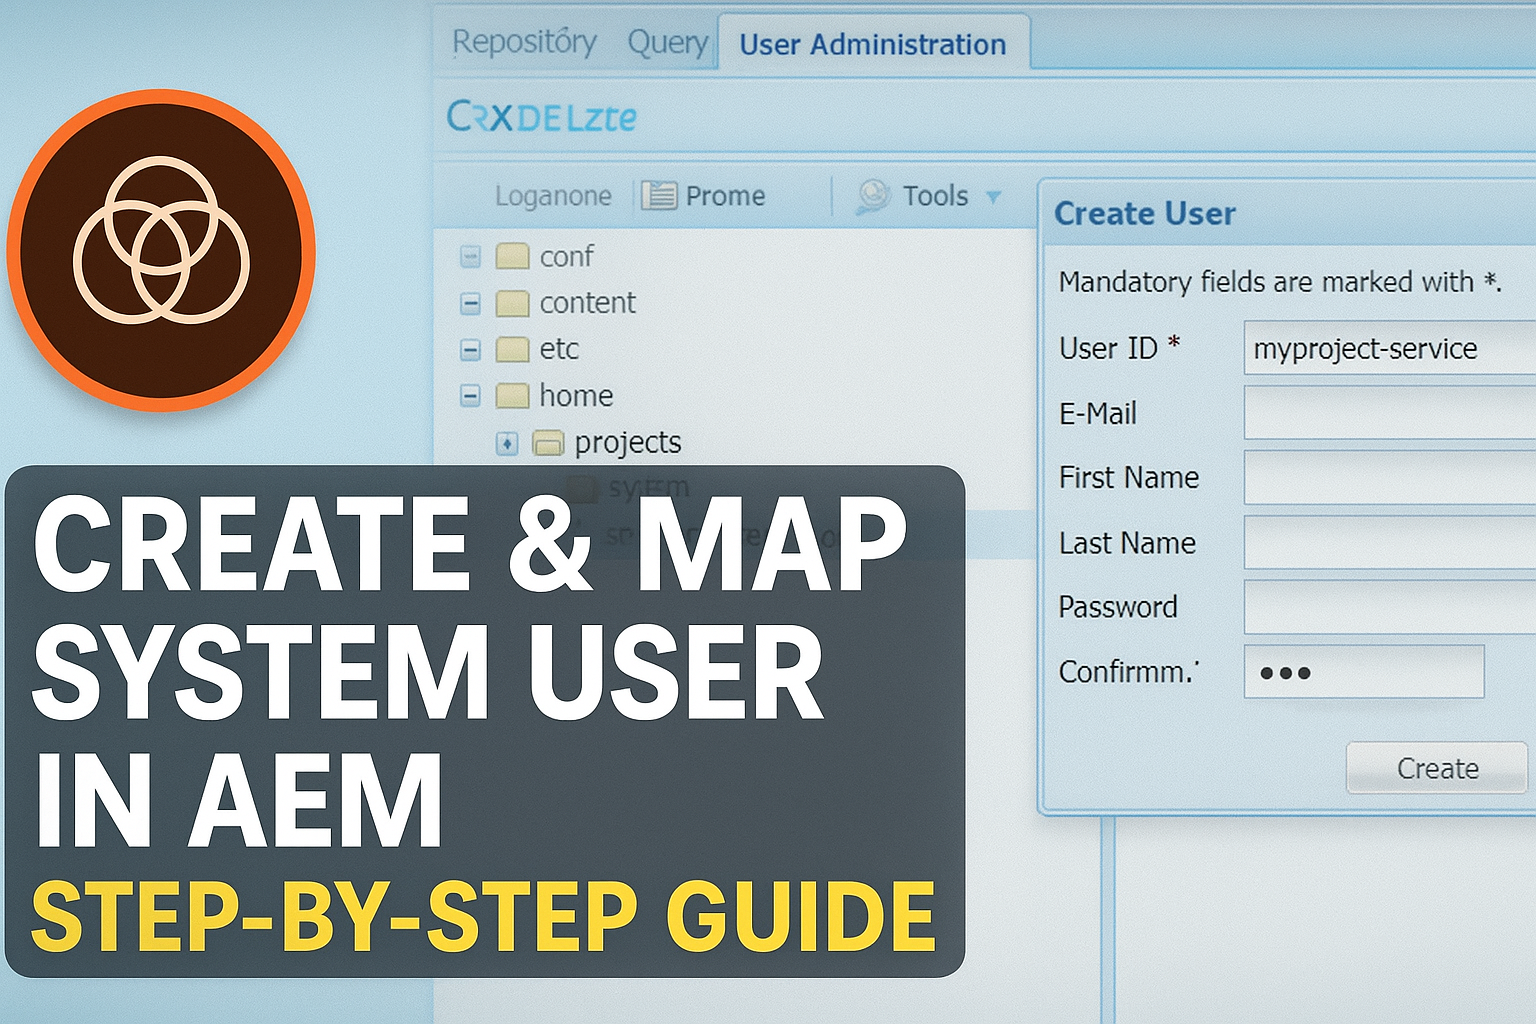
How to Create and Map a System User in AEM (Step-by-Step Guide)

 In Adobe Experience Manager (AEM), when you build services or backend logic, you often need to access JCR (Java Content Repository) securely. For this, you don’t use regular users—you use System Users.


System Users are special, non-login users used for service-level operations. They don’t have passwords and are safer to use than admin or normal users.

Let’s walk through the steps to create and map a system user in AEM.


Step 1: Create a System User

  • Go to AEM Web Console: http://localhost:4502/crx/explorer/index.jsp
  • Log in with admin credentials.
  • Click on User Administration tab.


  • Click Create System User, and fill:
  • User ID: inowate-test-user
  • Add path. Click Create.(Under /home/system, create a folder for your project if not already created (example: /home/system/myproject). else you can create directly in system)
Note:  I'm assigning permissions to this folder because my contact form submissions will be stored in the JCR under this location. In your case, you should grant permissions to the folder where you intend to read, write, update, delete, or modify JCR nodes, depending on your specific requirements.


Check following screenshot from my practical work


Step 2: Assign Required Permissions

  • http://localhost:4502/useradmin
  • Search your system user: inowate-test-user
  • Select the user, and assign read/write permissions to specific paths your service will access. For example: (/content/myproject, /var/contact-form-submission)

Avoid giving unnecessary permissions. Check the following screenshot


Step 3: Map the User with a Service

  • http://localhost:4502/system/console/configMgr
  • search (Apache Sling Service User Mapper Service Amendment)
  • Add an entry like the following screenshot.


User System user in code

Now we can use system user in our code in servlet or in service where it required as per need
@Reference
private ResourceResolverFactory resolverFactory;

private ResourceResolver getServiceResourceResolver() {
    Map<String, Object> param = new HashMap<>();
    param.put(ResourceResolverFactory.SUBSERVICE, "my-service-name");
    try {
        return resolverFactory.getServiceResourceResolver(param);
    } catch (LoginException e) {
        log.error("Failed to get service resource resolver", e);
    }
    return null;
}


Conclusion

System users make your AEM services secure and clean. Just remember:

  • Create under /home/system
  • Use mapper config correctly
  • Give minimum permissions
  • Use getServiceResourceResolver() in your code


Wednesday, April 16, 2025

Getting Started with Django: Templates, Static Files, URLs, Views, and More

Getting Started with Django: Templates, Static Files, URLs, Views, and More


If you're new to Django, this post will walk you through some of the foundational concepts that are essential to building a Django project—from managing HTML templates and static files to handling routes, dynamic data, and user authentication.

Let’s break everything down step by step.

.


🧱 1. Templates: Where HTML Lives

In Django, if you want to create webpages using HTML, you store your HTML files inside a folder named templates.

Why?
Django uses its own templating engine to render HTML dynamically. So, keeping your HTML files in a dedicated templates folder is a best practice.

Example structure:

myapp/ ├── templates/ │ └── index.html

After this you add templates folder name in Templates oobject in  settings.py file like this 

        'DIRS': [BASE_DIR,"./templates"],

🎨 2. Static Files: CSS, JS, Images

Static files refer to your CSS, JavaScript, images, or any fonts that don’t change frequently.

To manage these in Django, you create a static folder:

Example structure:

myapp/ ├── static/ │ ├── css/style.css │ ├── js/script.js │ └── images/

In your HTML file, use Django’s {% load static %} tag to access them:

{% load static %} <link rel="stylesheet" href="{% static 'css/style.css' %}">

🖼️ 3. Media Files: User-Uploaded Content

All Static Media files are uploaded by users—like profile pictures, documents, or any other dynamic content.

To store these files, Django uses a media folder, and you need to configure it in your settings.py:


⚙️ 4. The settings.py File

Django's settings.py is the brain of your project. It controls:

  • Database configuration

  • Installed apps

  • Static and media file paths

  • Middleware

  • Templates configuration

  • Security settings

You’ll often come back to this file when changing configurations or integrating third-party apps.
 

🚀 5. Running the Django Project

Once your setup is ready and you've created your app, you can start the development server to run your Django project locally.

Use this command:

python manage.py runserver

By default, the server runs at http://127.0.0.1:8000/ — just open it in your browser to see your project live!

🧪 6. Migrations: Creating Database Tables

To create tables in the database (based on models you define), you use Django’s migration system.

Run this command:

python manage.py migrate

This applies all the built-in or custom model changes to your database. It's like syncing your database with your models.

👮 7. Creating a Superuser (Admin Panel)

Django has a built-in admin panel. To access it, you need a superuser account.

Create it using this command:

python manage.py createsuperuser

Fill in the username, email, and password. Then you can log into /admin and manage your data via an intuitive UI.

To go on admin dashboard you write /admin on after IP address then you can see your admin dashboard


📍 8. Routing in Django

In Django, routing means connecting a URL to a view function.

➕ Static Routes

  1. Create a function in views.py:

from django.http import HttpResponse
def aboutUs(request): return HttpResponse("Hello world")
  1. Add it in urls.py:

from django.urls import path from myproject import views myproject means your pproject folder name where you add your settings.py file urlpatterns = [ path('about-us/', views.aboutUs), ]

🔁 Dynamic Routes

Django allows you to create dynamic URL patterns to capture and use data directly from the URL.

You can define the type of data expected in the route using converters.

There are three commonly used types:

1. int → Accepts only integers
path('about/<int:courseid>/', views.courseDetail)
Example URL: /about/123/s

2. str → Accepts any non-empty string (excluding slashes)
path('about/<str:courseid>/', views.courseDetail)
Example URL: /about/python/

3. slug → Accepts letters, numbers, underscores, and hyphens
path('about/<slug:courseid>/', views.courseDetail)
Example URL: /about/hello-123/

Example View

Inside views.py, you can access the dynamic value like this:

from django.http import HttpResponse def courseDetail(request, courseid): return HttpResponse(f"Course ID is {courseid}")

This is useful for pages like course detail pages, product pages, blog posts, etc.

📦 9. Sending and Receiving Dynamic Data

Sometimes you want to send data from views to templates.

In views.py:

def homepage(request):
data = { "title": "Home Page", "name": "Welcome to my Django website" } return render(request, "index.html", data)

In index.html, receive it like this:

<title>{{ title }}</title>
<h1>{{ name }}</h1>

🔗 9. Linking URLs in Templates

Django provides the {% url %} tag for safe and dynamic internal linking.

Make sure your route in urls.py has a name:

path('about/<int>/', views.courseDetail, name='about')

Then in your template:

<a href="{% url 'about' %}">About</a>

🕵️ 10. Current Page Path

Want to know which page you're on?

In your template, you can use:

{{ request.path }}

This will return the current URL path, useful for active menu highlighting or logging.

🛠️ How to Create a Model in Django

Now we’ll walk through the steps to create a basic model in Django — from setting up your app to registering your model in the Django admin panel. Let's get started!

📁 Step 1: Create a New App

Before creating any models, you need to create a new Django app. In this example, we’ll call it service. Run the following command in your terminal: python manage.py startapp service This will generate a service folder with default files including models.py, admin.py, and more

✍️ Step 2: Define Your Model

Open service/models.py and define your model class. Here’s an example model for a service:

from django.db import models

class Service(models.Model): service_icon = models.CharField(max_length=50) service_title = models.CharField(max_length=50) service_des = models.TextField()

This creates a model with three fields: icon, title, and description.

🧱 Step 3: Create Migrations

Once the model is defined, generate the migration file that Django uses to create the corresponding database table:

python manage.py makemigrations

This will create a migration file under the migrations/ folder of your service app.

🗃️ Step 4: Apply Migrations

Now, apply the migration to actually create the table in your database:

python manage.py migrate

Your Service model is now part of the database!

⚙️ Step 5: Register the Model in Django Admin

To manage the Service model from the Django admin panel, register it in service/admin.py:

from django.contrib import admin

from service.models import Service class ServiceAdmin(admin.ModelAdmin): list_display = ('service_icon', 'service_title', 'service_des') admin.site.register(Service, ServiceAdmin)

This will show the service records with icon, title, and description columns in the Django admin dashboard.

Thursday, February 27, 2025

How to Use Adobe AEM SCSS in UI.Frontend: A Simple Guide


 When to Use UI.Frontend in AEM

Imagine you’re building a custom theme for an AEM site. Here’s how UI. Frontend helps:

Organized Code: Use the styles folder to manage SCSS files for your theme, like _variables.scss for colors and fonts.

Efficient Builds: The dist folder ensures your compiled CSS and JS are ready for deployment.

Dynamic Assets: Store static images in resources and dynamic ones in DAM.

Scalability: As your project grows, you can add more folders and files without clutter.


Benefits

Fast Loading: Compiled SCSS and JS in the dist folder to ensure optimized, minified code for faster page loads.

Organized Assets: Proper folder structure helps search engines crawl your site efficiently.

Reusable Components: Component-specific SCSS and JS make it easier to maintain and update your site.


Folder Structure in UI.Frontend

The folder structure is key to organizing your SCSS, JS, and other assets. Here’s a breakdown of how it works:

complete folder structure

1. UI.Frontend

This is the main folder created by default when you set up an AEM project. It’s where all your front-end code lives.

2. Dist Folder

The dist folder is important. When you build your project (using commands like npm run prod), your CSS and JS files are compiled and placed here. From dist, these files move to ui.apps/clientlibs/(your clientlibs name) and then get exported to the AEM server.

Pro Tip: If you delete the dist folder, don’t worry! Just run the build command again, and it will recreate the folder with all your compiled SCSS and JS files.

3. ProjectName Folder

Inside the src folder, you can create a separate folder (like projectName) to keep all your SCSS, JS, and assets organized. Alternatively, you can use the default components and resources folders. In the screenshot, I’ve created a separate folder for better organization.

4. JS Folder

The js folder is where you store all your JavaScript files. If you’re using packages like Bootstrap, you can either:

  • Install them via npm and reference them in package.json.
  • Download the files manually and place them in js/global/. Both approaches have their benefits:
  • npm approach: Easier to manage and update packages.
  • Manual download: More control over specific versions and no dependency on npm.
manage files in js


5. Resources Folder

Use the resources folder for static assets like images that won’t change often. For dynamic assets (images that might change), use the AEM DAM (Digital Asset Management) folder.
Example:

  • From resources: background: url("../resources/images/dotted-pattern.svg");
  • From DAM: background-image: url(/content/dam/your-folder/img/common/Plus.svg);

6. Styles Folder

The styles folder is where your SCSS files live. You can organize it further:

  • styles/base: For global files like _variables.scss or package files like _bootstrap.min.scss.
  • styles/components: For component-specific SCSS files.

You can create more folders inside styles as needed. (Points 6, 7, and 8 from the Main SS are addressed here.)

manage file in style

7. main.js + main.scss

These are the entry points for your project:

  • In main.scss, import all your SCSS files. Start with package files (if using downloaded packages) and then your custom SCSS files.
  • In main.js, import main.scss at the top, followed by all your JS files.

Examples

in main.scss import syntax

in main.jsimport syntax


Important Configuration Files

  1. clintlib.config.js 

This file is a configuration file for AEM Client Libraries (ClientLibs), using aem-clientlib-generator to manage JavaScript, CSS, and other assets for Adobe Experience Manager (AEM). Let’s go through it step by step:


// path: A Node.js module used to handle and manipulate file paths.
// { dependencies } = require("webpack"): Extracts dependencies from Webpack, but this isn't actually used later in the file.
const path = require("path");
const { dependencies } = require("webpack");


// BUILD_DIR: The output directory where Webpack compiles assets (dist as we discssued above it contain our all complied css+js).
// CLIENTLIB_DIR: The directory inside the AEM project where the ClientLibs are stored (/apps/projectname/clientlibs .
const BUILD_DIR = path.join(__dirname, "dist");
const CLIENTLIB_DIR = path.join(
__dirname,
"..",
"ui.apps",
"src",
"main",
"content",
"jcr_root",
"apps",
"projectName",
"clientlibs"
);


// 1. allowProxy: true: Allows accessing the client libraries via /etc.clientlibs/ instead of /apps/eti/clientlibs/.
// 2. serializationFormat: "xml": Defines the format for ClientLibs in AEM (used in .content.xml files).
// 3. cssProcessor: ["default:none", "min:none"]: Disables CSS minification.
// 4. jsProcessor: ["default:none", "min:none"]: Disables JavaScript minification.

const libsBaseConfig = {
allowProxy: true,
serializationFormat: "xml",
cssProcessor: ["default:none", "min:none"],
jsProcessor: ["default:none", "min:none"],
};

// context: BUILD_DIR: Sets the build directory as the working context.
// clientLibRoot: CLIENTLIB_DIR: Specifies the target directory inside AEM where the client libraries
module.exports = {
context: BUILD_DIR,
clientLibRoot: CLIENTLIB_DIR,

// libs: An array containing multiple ClientLibs definitions.
libs: [

// This defines a ClientLib named clientlib-dependencies:
// categories: ["eti.dependencies"]: Used to include this ClientLib in AEM components.
// cwd: "clientlib-dependencies": Looks for assets inside the clientlib-dependencies folder.
// files: ["**/*.js"], ["**/*.css"]: Copies all JavaScript and CSS files.
{
...libsBaseConfig,
name: "clientlib-dependencies",
categories: ["projectName.dependencies"],
assets: {
// Copy entrypoint scripts and stylesheets into the respective ClientLib
// directories
js: {
cwd: "clientlib-dependencies",
files: ["**/*.js"],
flatten: false,
},
css: {
cwd: "clientlib-dependencies",
files: ["**/*.css"],
flatten: false,
},
},
},

// Defines a ClientLib named clientlib-site:
// categories: ["eti.site"]: Used to load this ClientLib in AEM components.
// dependencies: ["eti.dependencies"]: Ensures that clientlib-dependencies is loaded first.
// Also includes non-JS/CSS files in resources, ignoring JS and CSS
{
...libsBaseConfig,
name: "clientlib-site",
categories: ["projectName.site"],
dependencies: ["projectName.dependencies"],
assets: {
// Copy entrypoint scripts and stylesheets into the respective ClientLib
// directories
js: {
cwd: "clientlib-site",
files: ["**/*.js"],
flatten: false,
},
css: {
cwd: "clientlib-site",
files: ["**/*.css"],
flatten: false,
},

// Copy all other files into the `resources` ClientLib directory
resources: {
cwd: "clientlib-site",
files: ["**/*.*"],
flatten: false,
ignore: ["**/*.js", "**/*.css"],
},
},
},


// Defines ClientLib clientlib-projectName:
// categories: ["projectName-site"]: Used in AEM components.
// dependencies: ["projectName.dependencies"]: Ensures dependent scripts load first.
// Similar to clientlib-site, it includes JS, CSS, and other assets.
{
...libsBaseConfig,
name: "clientlib-projectName",
categories: ["projectName-site"],
dependencies: ["projectName.dependencies"],
assets: {
// Copy entrypoint scripts and stylesheets into the respective ClientLib
// directories
js: {
cwd: "clientlib-projectName",
files: ["**/*.js"],
flatten: false,
},
css: {
cwd: "clientlib-projectName",
files: ["**/*.css"],
flatten: false,
},

// Copy all other files into the `resources` ClientLib directory
resources: {
cwd: "clientlib-projectName",
files: ["**/*.*"],
flatten: false,
ignore: ["**/*.js", "**/*.css"],
},
},
},
],
};


2. webpack.common.js

webpack.common.js is used to store shared configurations like entry points, output, and loaders.

"use strict";

// node.j plugin
const path = require("path");
const MiniCssExtractPlugin = require("mini-css-extract-plugin");
const TSConfigPathsPlugin = require("tsconfig-paths-webpack-plugin");
const CopyWebpackPlugin = require("copy-webpack-plugin");
const { CleanWebpackPlugin } = require("clean-webpack-plugin");
const ESLintPlugin = require("eslint-webpack-plugin");

const SOURCE_ROOT = __dirname + "/src/main/webpack";

const resolve = {
extensions: [".js", ".ts"],
plugins: [
new TSConfigPathsPlugin({
configFile: "./tsconfig.json",
}),
],
};

module.exports = {
resolve: resolve,
// Defines the main entry file for your Project
entry: {
yourproject: SOURCE_ROOT + "/yourproject/main.js",
},

// Controls output structure (clientlib-yourproject/ vs clientlib-dependencies/)
// [name] dynamically gets replaced with the actual chunk name, so for the yourproject entry, Webpack generates:
// it will create file with this name inside dist like dist/clientlib-yourproject/yourproject.js
output: {
filename: (chunkData) => {
return chunkData.chunk.name === "dependencies"
? "clientlib-dependencies/[name].js"
: "clientlib-yourproject/[name].js";
},
path: path.resolve(__dirname, "dist"), // here we are point to dist folder as we discussed above
},
module: {
rules: [
{
test: /\.tsx?$/,
exclude: /node_modules/,
use: [
{
loader: "ts-loader",
},
{
loader: "glob-import-loader",
options: {
resolve: resolve,
},
},
],
},
{
test: /\.scss$/,
use: [
MiniCssExtractPlugin.loader,
{
loader: "css-loader",
options: {
url: false,
},
},
{
loader: "postcss-loader",
options: {
plugins() {
return [require("autoprefixer")];
},
},
},
{
loader: "sass-loader",
},
{
loader: "glob-import-loader",
options: {
resolve: resolve,
},
},
],
},
],
},
resolve: {
alias: {
swiper: path.resolve(__dirname, "node_modules", "swiper"),
},
},
plugins: [
/* will clean old files from the dist folder before generating new ones.
The CleanWebpackPlugin automatically deletes files from the dist folder_
because Webpack's output.path defines where the build files go */
new CleanWebpackPlugin(),

// Checks code quality
new ESLintPlugin({
extensions: ["js", "ts", "tsx"],
}),

//MiniCssExtractPlugin extracts CSS into a separate file inside
//dist/clientlib-emoney/ so that AEM can use it as a client library.
new MiniCssExtractPlugin({
filename: "clientlib-yourproject/[name].css",
}),

/*This plugin copies static files (like images, fonts, etc.) from the
source folder (emoney/resources) to dist/clientlib-emoney/ so
they can be used in the final build.*/
new CopyWebpackPlugin({
patterns: [
{
from: path.resolve(__dirname, SOURCE_ROOT + "/yourproject/resources"),
to: "./clientlib-yourproject/",
},
],
}),
],
stats: {
assetsSort: "chunks",
builtAt: true,
children: false,
chunkGroups: true,
chunkOrigins: true,
colors: false,
errors: true,
errorDetails: true,
env: true,
modules: false,
performance: true,
providedExports: false,
source: false,
warnings: true,
},
};


Conclusion

In conclusion, using UI.Frontend in AEM helps organize and manage front-end code efficiently. It ensures fast loading through optimized, minified CSS and JS files, and maintains a clear folder structure for scalability. Proper configuration files like `clintlib.config.js` and `webpack.common.js` further streamline the build process, making it easier to maintain and update the site.